Sunday, September 28, 2014

Pepper Pillows

We were gifted with half a bushel of banana peppers a few days ago by our neighbor and I've been coming up with as many recipes as I can to use them all.  Luckily, for me, they are not very hot, but they are full of flavor. When I make this recipe again using these same peppers, I'll add a splash of hot sauce.  They are delicious as they are, but a little more heat would be great, too.  Also, feel free to use the peppers you prefer.  If you don't like any heat, use bell peppers.  If you like more heat, then use jalapenos would be a good choice.

PEPPER PILLOWS

8 oz. cream cheese (I used reduced fat, but fat free or original would work just as well)
1 1/2 cups shredded cheddar cheese (6 oz.)
1/2 diced fresh banana peppers (or others of your choice)
Salt and pepper to taste
Garlic powder to taste
1 can (16.3 oz.) refrigerated buttermilk biscuits
1 egg
Water

Preheat oven to 350° F.  In mixing bowl, stir together cream cheese, Cheddar cheese, peppers, salt, pepper, and garlic powder until well combined.  Set aside.


Using a rolling pin and some flour to dust, roll each biscuit into an 8 inch circle.  Place one heaping Tablespoon of the filling in the center of the dough.

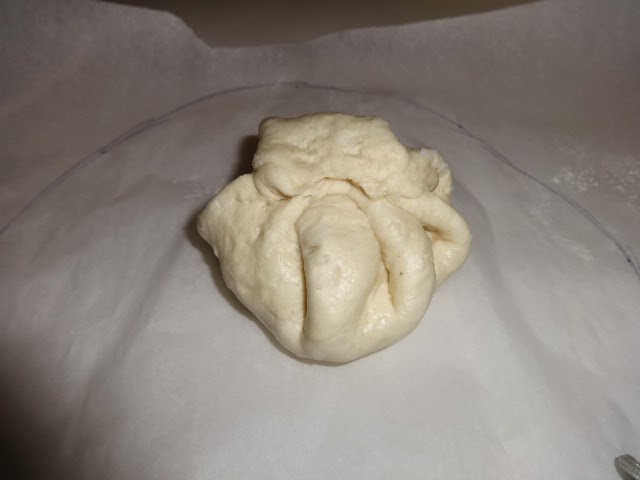
  Bring the bottom up and pinch together to seal.  Place upside down on a parchment paper lined baking sheet. 


Beat the egg with a splash of water and brush the tops of the dough.
Sprinkle the tops with a little more salt and pepper.  Place in the oven and bake for 15 to 18 minutes or until browned.  Serve warm.


Thursday, September 25, 2014

Beef Tips In Gravy With Mashed Potatoes


My grocery store has a small section where they mark down various meats on clearance, and that is usually when I purchase beef.  These steaks were marked down to a decent price,  and I decided to stretch them further by making them into beef tips in gravy and also make mashed potatoes for it to go on.  Other than the steaks, the rest of the ingredients are just pantry staples.
BEEF TIPS IN GRAVY OVER MASHED POTATOES
(Printable recipe)

Mashed Potatoes:
8 potatoes (2 per person)
2/3 cup butter
1/2 milk
Seasoned salt and pepper to taste

Wash and peel potatoes, cut potatoes in small chunks, cover with salted water, and boil just until tender (about 20 minutes or so). Drain well (important). Once drained, put the uncovered pan of potatoes on the burner over medium heat for just a couple of minutes; this will steam off any additional water so your potatoes will be fluffier – be careful not to scorch them.

Once all water has evaporated, remove from the heat and immediately add the butter and milk. Mash with a food masher, using an up and down motion, just enough to remove the lumps – do not stir them, as your potatoes will end up like glue.  Seasoned salt and pepper to taste, and add more pats of butter on to the top.


Beef Tips In Gravy:

1 pound of beef steak, diced into small pieces
1/4 cup flour
1/4 cup butter
2 cans beef broth (not pictured above)
Seasoned salt and pepper
Place the flour into a large zip top bag and add the beef.  Shake to make sure all the beef tips are coated with the flour.  Melt the butter in a pan and once melted, add the beef tips and cook until browned.  At this time add the rest of the flour that might have been left in the bag and stir it to cook the flour, for about a minute.  Add the beef broth a little at a time stirring constantly to make the gravy.  Let it cook until it is the desired consistency.  A good way to test it is to see if the gravy will coat the back of a spoon, and remember that gravy will thicken as it cools so it should be a little thinner than you desire for the final product.  Add seasoned salt and pepper to taste and stir in.
Place about a cup of mashed potatoes onto the plate and ladle about a quarter cup of beef tips in gravy over the top and enjoy.
This is comfort food at it's finest.  Enjoy!

Wednesday, September 24, 2014

My First Knitted Garment - A Preemie Sweater

 After wanting to learn how to knit for years, and after a poor attempt at teaching myself, you can imagine how excited to find out my local library was going to start at knitting group.  We met in October, 2013, to establish interest and monthly after that to share knowledge, share company, and show our projects.  It's a wonderful, helpful group, and I credit the librarian that established it with teaching me to knit.  We only meet once a month, so when I have questions in between meetings I turn to Youtube.  
When we found out that some very dear friends of ours was having a girl I got excited and started looking for patterns on Ravelry.  When the baby came early, I refined my search for something for a preemie.  This pattern was labeled as easy and even though it took me FIVE videos to understand each technique, in the end it actually was pretty easy for a beginner.
 
This pattern called for buttonholes but I decided to not add them.
I learned how to use double point needles, always labeled as dpn on patterns.  I went to buy all the items I'd need to make this pattern and I had no idea what dpn stood for and wound up buying circular needles instead.  Needless to say, I figured it out and after another trip back I purchased what I needed.
This sweater is designed to fit a 5 pound preemie and it did perfectly.  It doesn't say so on the pattern, but I would imagine if you used a larger sized needle then it would fit a large baby.  I haven't tried out that theory, but it sounds like a good one to me.
It was my very first project other than the dishcloths I learned on.  I can see all the little flaws that I made and was actually very reluctant to send it as a gift but I'm so glad I did.  The parents loved it and the baby was only able to wear it for a short time.

My two favorite Youtube channels are Very Pink Knits and New Stitch A Day, and these are where I learn every technique that I'm unfamiliar with are is causing me some struggle.

I'll be making a few more posts of some of my other knitting projects soon, so keep checking back.

Monday, September 22, 2014

Spicy Roasted Pumpkin Seeds


I saved all the seeds from one of the pumpkins from my garden.  I'll wind up saving them from all the pumpkins, this is just the first one I cut open.  These are SO delicious that, now, I feel these pumpkins don't give near enough seeds!
I used a product called Spicy Farm Dust that my husband picked up for me at a tiny little store near where he works.  I use it on everything savory, but if you don't have access to it, I'll give you a combination that would taste very similar.

The seeds are really easy to get out of the membrane and it's actually a nice, mindless process.  Just scoop up a bit of the pumpkin guts and pick the seeds out.  I usually just squeezed the tip of the seed and it just popped right off into my hand.
I put the seeds into a colander and the pulp into a bowl that I later took to the compost bin.

Once I had all the seeds free, I rinsed them under water to get the stickiness off of them and any loose membrane.  It's okay if a little bit is sticking to some of the seeds.

Place the seeds in a jar and fill with water to cover the seeds by an inch and add 1 Tablespoon of salt.  Stir it around to help dissolve the salt and place a lid on it.  Leave it on the counter overnight or up to 24 hours.  I'd pick the jar up and give it a little swirl but it would be fine to just leave it sitting.
Once they've sat long enough, drain them into a colander but DO NOT rinse.  They need to be spread out to dry a little and you could do this on some parchment paper but I decided to speed the process and used my dehydrator for a couple of hours on 105°F.
  Once they were dry on the surface I put them in a mixing bowl and added 1/2 teaspoon olive oil and a few shakes of Spicy Farm Dust*, probably about 1/4 teaspoon.  Stirred them well until all the seeds were coated and the seasoning was evenly distributed.
  I covered two baking sheets with parchment paper and spread the seeds onto them, trying to keep them from overlapping.  I then put them in a preheated 350°F oven for about 35 minutes or until toasted.
They are ready to eat as soon as they come out, or can be cooled and stored in an airtight container.

These are so, so, so GOOD!  I was honestly surprised by how much we really like them.

*If you don't have Spicy Farm Dust, and I seriously doubt that you do, you can season with a little season salt and cayenne pepper.

Sunday, September 21, 2014

Fast & Easy Mini Chicken Pot Pies

This post will only be showing a picture of the finished product.  My kitchen is a disaster area right now with all the garden harvest and canning going on. The only tidy place I could find to take a pic was in front of my calendar on my pantry door.  LOL!

I came up with this recipe to use up some leftover rotisserie chicken.  Chicken pot pie is one of my most favorite dishes but I didn't feel like taking the time to make pie crusts, so I was rummaging around in the pantry to see what I could use to quickly make what I had a taste for.  I'll share the exact recipe that I used, but feel free to add whatever ingredients you have on hand, the only thing that matters is that the meat and veggies already be cooked.  I'll also share some ideas for various meat and veggie combinations that sound like they'd be great, too.

FAST & EASY MINI CHICKEN POT PIES

1 cup dry baking mix (I used Krustez pancake mix)
1 cup milk
leftover chicken, chopped
canned veggies (I used sliced potatoes, corn, and green beans)
seasoned salt and pepper

Preheat oven to 350° F.  Take a regular cupcake pan, one that makes 12 cupcakes and spray each cup with oil.

Mix the baking mix and milk together and measure one Tablespoon of the batter into each cup.  Take a 1/4 cup measuring cup and fill it with the chicken and veggies then add it one of the cups.  Continue doing this until all the cups are full.  Sprinkle the seasoned salt and pepper on each to taste. Take the batter and add one Tablespoon of it onto the top of each cup.

Place in oven and bake for 25 minutes, or until they start to turn golden brown.  Serve warm.

Some of the combos that sound like they'd be good: 
  • meatloaf, carrots, and potatoes
  • taco meat, cheese, salsa
  • ham, broccoli, cheese
  • sausage, peppers, onions
 I ended up with about a cup of the veggies still in the bowl so I decided to chop up some more chicken and mix up about 1 1/2 cups of batter.  I sprayed a pie dish with oil, added 1/2 cup of batter then layered with the veggies and chicken spreading them out evenly.  I sprinkled on the seasoned salt and pepper and then poured on the rest of the batter.  I baked it with the mini ones and it took about another 5 minutes to start turning golden.

Please leave a comment to let me know what other combos you think would make a good Fast & Easy Mini Pot Pie.

Thursday, September 18, 2014

Peppered Brown Sugar Bacon


This recipe for bacon with pepper and brown sugar is very easy and the results are amazingly delicious.  Bacon is delicious no matter how it's prepared, but this way somehow makes it extra special.
The ingredients are easy:  bacon, black pepper, and brown sugar.  That's it.  Start by preheating the oven to 325° F.  This temperature is very important.  As the sugar will burn before the bacon is done if the temperature is even 25 degrees higher.

Line baking sheets with parchment paper.  Make sure the baking sheets you use have sides on them as the bacon will make grease and you don't want to start a fire in the bottom of your oven.  Lay the bacon on the paper without overlapping.  If you use a pepper grinder, grind some black pepper all over the bacon, as much as you prefer, otherwise, just shake some on from your pepper shaker.  I'm not really one for adding heat to my food in this manner, so I often aim for light, but in this recipe, I actually prefer a lot of pepper, but use as much as you feel comfortable with.  You can always adjust it the next time you make it.  Lastly, sprinkle each slice with brown sugar.  Be generous with this, also. 
Place in the 325° oven for about half an hour.  Check after 20 minutes and every 5 minutes after that.  Cook until they look like these in the pics.  The amount of time will also depend on how thick the bacon is that you are using.  I've made it with both thin and thick and while it's delicious both thicknesses, we seem to like it more on the thicker side.
Be warned, though.  This amazingly awesome bacon is highly addictive.  You will not be able to eat just one and there will be NO leftovers, at least there never is in my house.  We often don't even make it to the table and just stand around the stove eating it off the baking sheets and burning our tongues like only slightly civilized cave men! 

Wednesday, September 17, 2014

Sloppy Joe Seasoned Slow Cooked Pork Roast

Sometimes I get creative when coming up with dinner ideas.  I had just scored a great deal on a new Crock Pot and couldn't wait to cook something in it.  I had this pork roast and hadn't really thought about what to do with it to give it some extra flavor.  We like to eat it shredded on buns but I was all out of barbeque sauce and didn't feel like making any.  So I scoured the pantry to see what sort of things I could combine to give it some oomph.          
I found a package of dry Sloppy Joe seasoning mix and a can of diced tomatoes and thought that sounded good enough.  I sprayed the interior of the crock, placed the roast in the bottom of the pot, sprinkled the mix over the roast and played with it a little like it was a rub.  I then just opened and dumped the can of tomatoes over the top of the rubbed roast.  I set it on high and let it cook.  Since the roast was thawed, it probably only took about 5 hours on high, it would probably take longer if it was frozen, and definitely longer if on low.  This roast was about 2.5 pounds.
Use two forks to shred it right in the crock and turn it to warm to keep it ready.  We just ate it on buns and some folks put a slice of cheese on it, too.  Serve with a nice veggie salad and it's a filling meal.

Monday, September 15, 2014

Wear Those Gardening Gloves Every Time!

I have a great pair of gardening gloves that I've only been wearing when I'm picking tomatoes.  I can't stand to pick a mushy tomato and have it goosh all over my hand, nor did I was to encounter any of those disgusting tomato worms.  I did wear them the other day when I picked beets and they kept my hands clean while brushing off the soil from the roots.

Decided to pick the rest of the strawberry popcorn today and since the stalks were no longer needed I would pull them up, then remove the ears and toss the stalks into a pile for my husband to run over with the lawnmower later.  I'd picked at least 30 stalks then had my kids come help me a little, and my daughter noticed a weird looking caterpillar and was ready to call it quits.  I picked that one and tossed it aside, and then she noticed another one on another stalk.  She did call it quits then and would only shuck the ears, not pull the stalks.  So I went to get that one and my hand just barely brushed that caterpillar and it instantly felt like I'd been zapped by fire.

 Needless to say, we were done picking corn for the day.  I came inside and washed my hands well and inspected it to see if there was anything leftover from the encounter.  No spines that I could see, and it wasn't even red, but it still stung quite a bit.

Not knowing what it was, I turned to the internet to help me.  I asked on my Facebook page and on a group's page that often answer people's garden bug questions.  I was able to find out that this is a Saddleback caterpillar and the spines on it are venomous.  Luckily, I did not have a bad reaction to it.  If you are allergic to it, you could go into anaphylactic shock.

I followed some suggestions on the site that was recommended and pressed some clear tape over the area several times to make sure any spines were removed, and applied a paste of baking soda and water.  I also wrapped it in a little plastic to keep it in place.  I then wrapped an ice pack around my hand.  I also took an allergy pill as soon as I came in the house as an extra precaution.

My hand stung and burned for about an hour and then eased completely.  The spot where I made contact is tender if I touch it but otherwise I feel just fine.  Luckily, I barely brushed it, I can only imagine the pain if I'd grabbed onto it with my whole hand.


Sunday, September 14, 2014

How to Remove Stains From Baking Sheets

My baking sheets see a lot of use and even though I usually line them with either foil or parchment paper they still wind up pretty stained over the years.  I've tried a variety of methods to remove the stains but this is the one I found that actually works and takes little to no effort on my part.
I only covered half with some fume free oven cleaner just to show a good before and after comparison.  I let it sit for 2 hours for the cleaner to work.
After the two hours I rinsed the cleaner from the pan and wiped it with a sponge.  There are still a few stains but overall it looks much better and it was a very easy process.

Saturday, September 13, 2014

Compost Bin From Pallets

After a successful garden this summer, I asked my husband to help me make a compost bin using the pallets he can get free at his work.  So he brought home five of them and we assembled it by screwing the two back pallets to the three facing out.  There was very little time involved and no real cost as we already had the screws. 

My daughter (right) and niece got very excited when they saw us building it and declared it their new playhouse.  I told them they could have it until I started filling it and I heard them discussing wallpaper options who gets the better bedroom.